Tuesday, October 23, 2007

Project 3 Finished.. Again..

Okay so after a 2 week hiatus, we have modified our game based on Doug and Kah's feedback, Ashlee did an awesome job on getting the switches to work, so now the game is a little more complex. Glen took care of the sound, and did some nice footsteps and drawing sound effects, however we found the drawing sound was a little messy and so we decided not to bother with it in the end. Ashlee and I drew up some quick 'maps' of the level that appear briefly before the level loads, giving the player a chance to try and memorize the layout of the level. We also added colour to the unlockable tiles, and end of level switches. We used a unique colour for each level that related to the objects in the background. I feel this helped to distinguish the levels a little better. I guess we would of liked to get the overall game a little more polished ( such as a sound or animation when the switch is pressed, and getting the preloader working) but we were all pretty busy with other papers for much of the extra time and kind of a little bit over this assignment. However we are really wrapped with our finished game, And although I cant speak for Glen or Ashlee, I really enjoyed this paper and learnt loads.

Heres the finished game!
Click
Level 1
Level 2
Level3

Tuesday, October 9, 2007

Project 3 finished

Heres the link to our finished game!

The Adventures of Sketchboy!

We didnt really manage to get a lot of the interactive features we would of liked, but in essence the game is there and I feel we managed to pull off the visual asthetic really well. You control sketchboy through a series of mazes in ever increasing difficulty to try and find the switch to open the next level.

I realised I've still got a few things that I havnt blogged yet, So here is how i made the 'fading in effect'
In photoshop, I drew over the finished piece of text using my graphics tablet, in progressively darker layers. The process was fairly time consuming but worth it a it really fits in with the style we were trying to achieve.

Monday, October 8, 2007

Project 3 Update

So I met with my group today and we attempted to finish the game off.

We imediatley ran into problems when I tried to put all 3 levels on the same timeline. For example sketchboy became unresponsive and wouldnt move, and when the level was 'completed' and the inter level cutscene began to play, Sketchboy, and all of the game tiles remained on screen, ruining the cutscene.

I messed around trying to fix these issues but got absoutely no where, I just couldnt get the three levels and the cutscenes to work together happily in the same .swf. So I was forced to opt for a backup solution (that unfortunaely, isnt nearly as polished, but at least it works) of exporting the game as a series of seperate .swf's and linking these together via buttons.

On a completely unrelated note, Here is the initial intro clip I wanted to use, unfortunately when imported into the flash the clip lost quite a lot of quality and ended up looking fairly grainy and didnt really fit well with the higher quality visuals I had attempted to use for the rest of the game, So it was reluctantely scrapped.

Major issues

Okay, so I'll start with the good news.. I finished off the intro movie, and added a button so it links to the first map, but this is where the problems start to arrise, The map loads and draws everything fine, but for some reason the keys seem to have no effect and so sketchboy cant move.

Unfortunately Glen and Ashlee havnt really been able to figure out the iso hit test code so we are un able to put in any of the switches or anything that we wanted either.

With time almost out, I guess we will meet tomorrow and try and salvage something to show for Wednesday..

Sunday, October 7, 2007

Cut scenes

With Sketchboys walk cycle in the bag, my tiles done, and the backgrounds mocked up, I began working on the cut scenes. With time fast running out, and Kah's emphasise on keeping the visual integrity of the game constant, I decided to try and go for a simple but elegant approach. I started out by video myself drawing sketchboy by hand, my intention was to heavily speed this up into only 2-3 seconds and use it for the intro movie. However it didnt come out terribly well, and looked quite grainy when played at the game resolution (800 x 600)

So I decided to just draw sketchboy the way I did for the rest of the game, in photoshop with my graphics tablet. I drew progressively more of the character onto a series of layers and animated these which worked out fairly well.

For the inter level cut scenes, I wanted to go for a nice simple pan from one 'environment' to the next, I experimented with importing one large image into flash and motion tweening my way around it, but found flash didn't really deal with rotating or resizing the image very well, and the image lost quite a lot of detail each time. So I ended up doing it in another program, recording it, an importing the video into flash.

Here is a fairly rough version of the cut scenes all linked together (The levels will load and play where the clip currently pauses)


I still have to work on a final cut scene
Tuesday, October 2, 2007

Level design

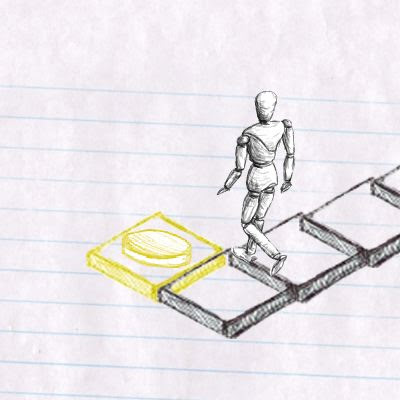
Ive been working on the 'Backgrounds' for each of the 3 levels. We wanted each level to have different background images behind the tiles, and for these images to match the style of the tiles to be used on it. For example the first level with the very sketchy looking tiles, was to have quite a crude looking background.
Level 1
Level 2
Level 3

Level mock up

I took the rotoscoped frames, loaded them into falsh and lined everything up, threw on some basic walking code, and the Sketch Boy character was finished.


I passed this .fla on to the rest of my group and we each began experimenting with the code Glenn and Ashlee had been working on. I drew up some tiles in photoshop and animate them to appear as thoush they were being 'drawn in' and then incorporated these into the code. Im quite happy with how it turned out visually, but its still very buggy.


Rotoscoping Process

With the process and style of how I wanted the character to look, and the rest of my groups agreement, I began the immensely time consuming process of rotoscoping all of Sketchboys 4 isometric walk cycles.

I was perhaps a little over ambitious and opted for 14 frames per walk cycle, in reality I probably could of gotten away with 8-10 and it would of looked fine, but I initially didn't realise quite how long the rotoscoping would take.

56 frames and 12 hours later and it was done..

Here are the sprite sheets.. I hope they're worth it...

Monday, October 1, 2007

Project 3 Update

Ok so I realised I haven't really blogged any of my work for this project so far, so I will try and rectify this now by posting some of the bits and pieces I've been working on.


Here are some experiments I did on various techniques to get the sketchy hand drawn look I was after for sketchboy. In the first experiment I rendered out a simple walk cycle from 3DS Max, I then printed these frames out, traced them by hand and then scanned them back in. Although it was quite quick to do, I felt the finished piece looked quite flat and lacked detail.


Next I tried drawing over the frames in photoshop using the line tool, this was quite slow going, and I wasn't really all that happy with the results.


Lastly I tried drawing over the frames with the pencil tool, and used a Wacom to do so, This was much faster than using the mouse and produced a much better result.